Publish a buildpack
Learn how to publish your buildpack to the Buildpack Registry.
0. Packaging your buildpack
Make sure you’ve followed the steps in Package a buildpack to create your buildpack image and publish it to an OCI registry.
NOTE: In order to publish your buildpack to the registry, its id must be in the format <namespace>/<name>. For example:
[buildpack]
id = "example/my-cnb"
1. Register your buildpack
With your buildpack image published to a public OCI registry, you can now run the following command to register that buildpack with the Buildpack Registry (but you must replace example/my-cnb with your image name):
pack buildpack register example/my-cnb
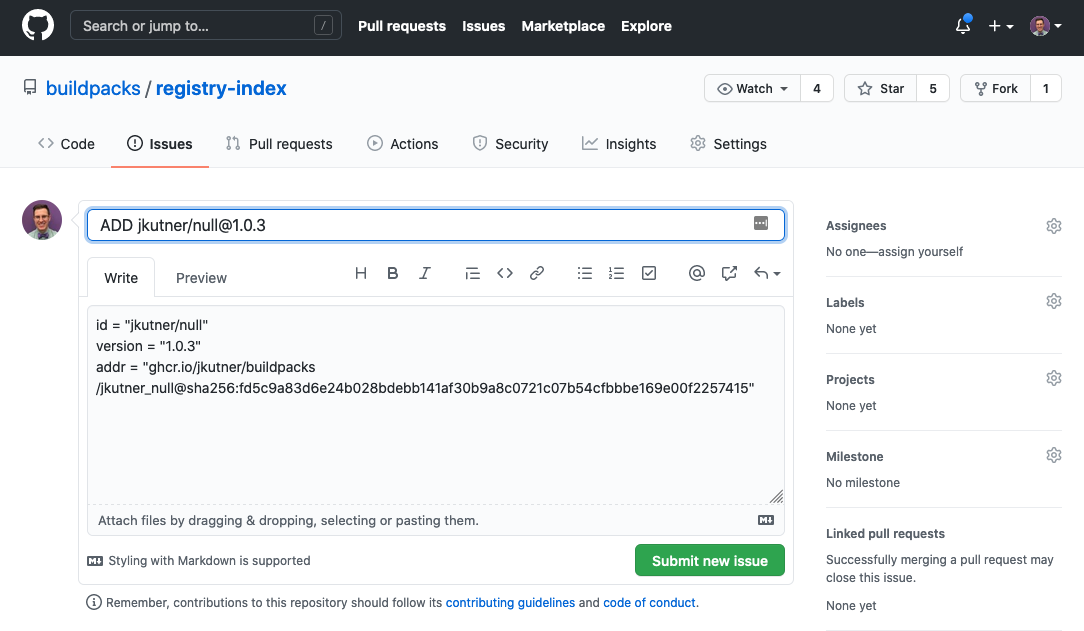
This will open GitHub in a browser and may ask you to authenticate with GitHub. After doing so, you’ll see a pre-populated GitHub Issue with the details of your buildpack. For example:

The pre-populated text in the body of the issue is considered structured data, and will be used to automatically add the buildpack to the registry index. Do not change it.
Click Submit new issue, and your request will be processed within seconds. If the image is a valid buildpack, it will be added to the registry. If there is a problem, the issue will be tagged as a “Failure” and a comment will be added with a link to get more details. Whether successful or not, the issue will be closed.
Managing your namespace
The first time you publish a buildpack with a given namespace, the registry will automatically assign your GitHub user as that namespace’s owner. From then on, only you can publish new buildpacks or buildpack versions under that namespace.
If you try to publish a buildpack with a namespace that’s already in use, the request will fail and the GitHub issue will be closed. You can add or change namespace owners by submitting a Pull Request to the buildpacks/registry-namespaces.